Friday, May 17, 2013

Glow in the Dark

This is Iron Man made using only lights in the dark. It turned out okay, but I never got a pictures that I liked that well. We block all sources in the room and then used lights and paper to make it look like Iron Man.

Monday, May 13, 2013

Painting (with bonus ceramic thing)


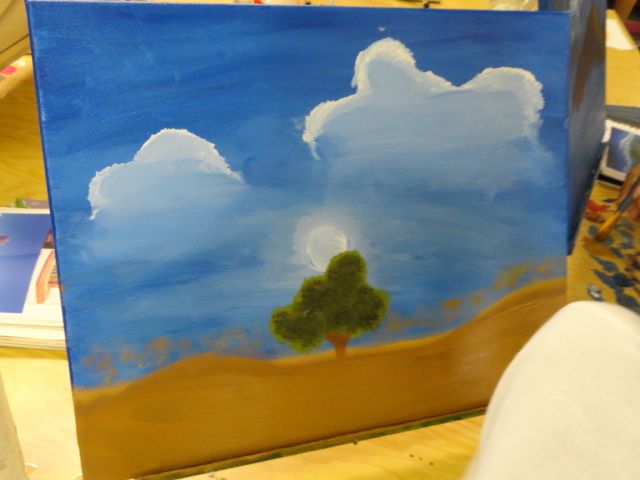
The two photos above are of me working on my painting and of the final product. I think that if I were at the location of my painting that it would be pretty hot, but nice and peaceful. There wouldn't be much movement and there also wouldn't be much sound. For paining I used two brush strokes. I used the long left to right strokes and then I used a dab or "poke" to make things like the tree and blowing sand.

This is a ceramic (clay) thing. It looks similar to a spider but I don't really know what it is. It is supposed to be a monster.

Friday, April 26, 2013

I like flowers! (as well as bugs)

This is my flower page and I LOVE TO MAKE FLOWERS WITH ADOBE ILLUSTRATOR!!!

Monday, April 22, 2013

Clay Monster


The first two fo the pictures are what I made on the iPad in class and the last photo is what I actually ended up making. It was really had to make things on the iPad but I finally came up with something that I liked. The clay was kind-of hard to work with if you didn't anything small because it breaks easily. Inside of the ball of clay (the body of the monster) there are small clay balls that will raddle after we fire the clay in the kiln. I definitally like the clay better than the iPad drawings but I will have to see what it looks like out of the kiln.

Zentagles (Not Really)


These are some photos of what we did for our zentangles. The first one (the triangle) is actually a zentangle, but the other two are not. For the last two we decided to paint the wall inverse colors. I though that it ended up looking really good, and kind-of like a rhinocerous.

Forced Perspective

This is a picture of me with forced perspective hair. Forced perspective is when you have two different items and different distances from teh camera so that the viewer sees something. This was the best of probably over 100 different pictures and 20 different perspectives. The hair is really only about two inches large.

Tuesday, March 26, 2013

Evil Pancakes

They are coming for you!

Half-way Point

 This is the linocut that we made and it is my favorite project so far. I really liked cutting out the stamp on the linoleum the best. I think the main reason it turned out the best is because I didn't draw it. I can't draw too well but I still like art. I also think that the blue and orange to together really well which makes it much better than the other one color stamps.

This is the portrait that we drew using shading. I think this project definitely taught me the most out of all the projects so-far. I wasn't really good at shading but this project really helped me with that as well as how the face looks.

Stamp Snake

This is a linocut of a snake. We took some linoleum and scraped out some of it to make the absence of colors to draw a picture. This was a really fun project and then when it worked that made it all the more fun. I wish there was a better way to line up the different colors but i still think that it worked pretty well.

Tuesday, March 12, 2013

Spray Paint Final Product

 This is the final product of the spray paint me photo post I made last month. Wehad to trace the different colors of the photo, then cut them out (which took forever), and then finally spray paint on the picture frame we made. While cutting out the different color stencils, I learned that accidentally cutting yourself really hurts. I didn't do the best job tracing because as you can see the colors don't line up at all but it at least still looks at me.

Self Portrait

This is a self portrait that I made by looking in a mirror (so amazing right?). It wasn't finished yet at the time of this photo. I added some more shading to the neck and ears and I also worked on highlighting the hair some more. I learned a lot of things about how the face is spaced out. Your eyes are half way down your head, you nose is half of the way down from that, and then your mouth is one-third of the way down from that. Your head is really differently shaped then I thought.

Wednesday, February 20, 2013

Spray Paint Me

Spray paint me.

Value Scale Project

This is the first drawing that I have done with actual shadowing. I do think that the shadowing looks all a little lighter on the computer and I also think that the transitions are really choppy and its like a puzzle of different shadow values. I also think that when I got to the left side of his face everything is off of where it is supposed to be. Next time I so a drawing I will make sure to make it have smooth transisions.

Junk Pile Shadow Art

This is a shadow bridge. We used a slide projector to cast a light on the wall and then put random junk in front of it to block the light and make a picture with the shadow. I thought it actually turned out really well. You can see the water underneath the bridge and all of the different support ropes and beams. The water was made by taking a transparent paper and coloring it blue with wet erase overhead markers.The ropes were made out of strings and cut up toilet paper rolls. In the end this was a really fun project that was rather difficult because finding trash that looked how you wanted it too can be hard.

Thursday, February 7, 2013

Monday, February 4, 2013

RHINO ATTACK!!!


EVERYONE RUN, THE RHINO IS LOOSE!!!

Chick (Skeleton)

This is chick, my Visual Arts I teachers girlfriend. The left one is my first drawing, and the right one is the second drawing after a week of class. I would have to say that I made a good number of improvements, mainly to detail. Lets go from the top down. In the first image the skull looks like an extra terrestrial and in the second one it looks more correctly shaped. Then we go to the jaw, in the first I kind of just added teeth and just drew it how I remember it looking, now how it actually looks. Next is the neck, as you can see in the first drawing I really didn't care to pay attention to the fact that it has many different pieces, I just wanted to get the drawing done. After that comes the ribcage, which is the same size as the skull, which is incorrect, whereas in the second photo I actually made the ribcage larger than the skull. Finally, is the arms. In the first drawingthe arms are really short, but in the second I drew the arms a little longer and more to proportion. Overall iI think that the second was 378% better than the first.

Friday, January 25, 2013

Newimal Bones

This is the skeletion of a gryphon (a lions tail and an eagles head), or at least it is what i think it would look like. We had to do all of the major bones such as the skull, ribs, and hips. First we selected a photo of our newimal online and printed it out. We then had to draw it on a seperate piece of paper. After that we had to try to look at what we drew and figure out where all the bones went. When I was done I was left with this.